How to Setup Online Office Hours
Of the many ways to conduct office hours online, here are some ways that might work for you. These methods also work for other kinds of online appointments. For video overviews, see: Office Hours in Canvas, Zoom & Calendly
Calendar in Canvas
Using the Calendar in Canvas that is associated with your class to create appointments allows students to reserve time slots to meet with you. You can include a link to Zoom or Teams in the meeting time slots so students can find their way to the online meeting easily.
To watch the complete process in Canvas, watch this video: Canvas Office Hours and for the student perspective: Canvas Office Hours - Students
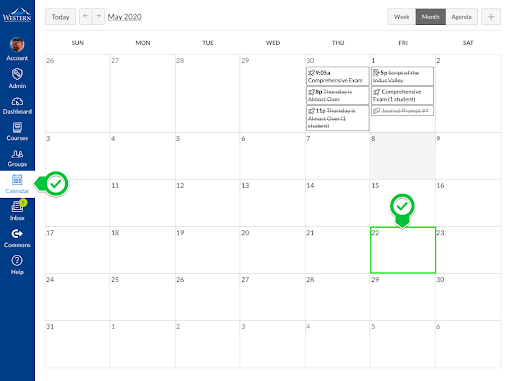
First, navigate to the Calendar in Canvas by clicking on the calendar icon in the vertical blue bar located at the far left.
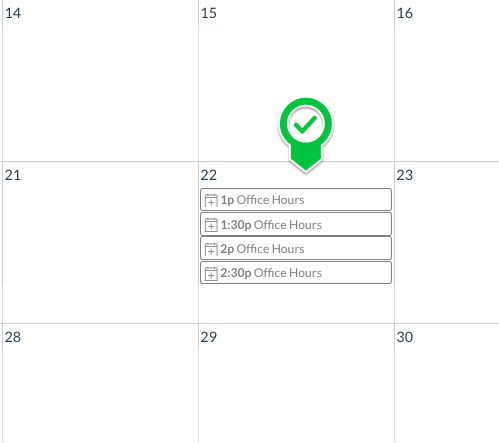
To create a new appointment double-click on the day where you wish to set up your office hours:
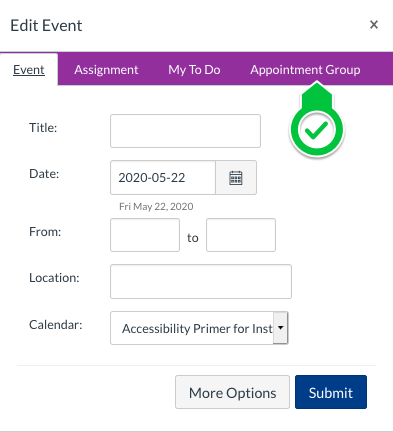
In the Edit Event window select Appointment Group
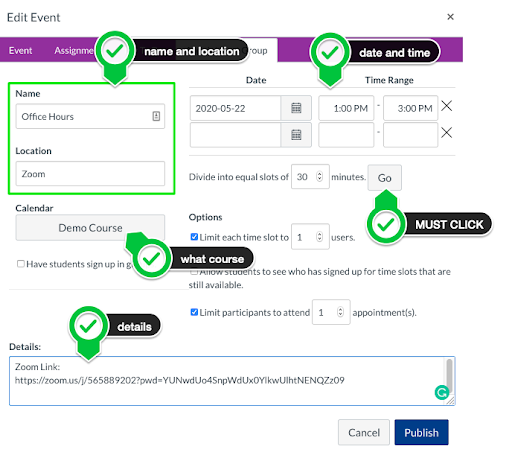
In the next window
- Add the name and location
- Add the date and time(s) for your office hours
- Select the course that the office hours will be for
- Add details (such as a Zoom link) and/or short description
- Select the duration of the individual office hour slots within the time frame and
YOU MUST CLICK GO to properly set up the appointment. Once you click Go you will see the time slots appear in a list. - Be sure to set the option for the number of students that can sign up for each time slot.
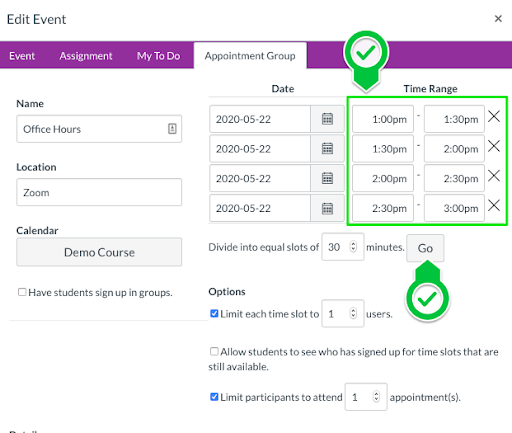
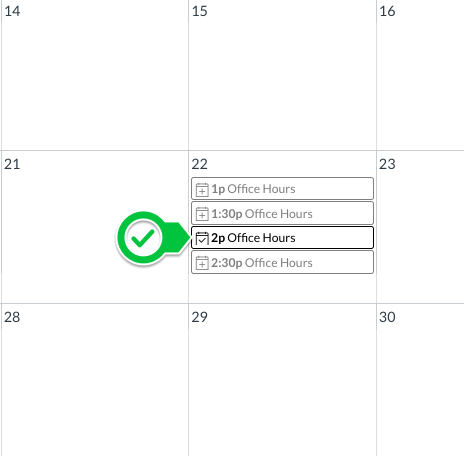
- You will see the list of your office hours on the day you selected in the calendar.
- When your student goes to the Canvas homepage they will see a View Course Calendar button at the far right.

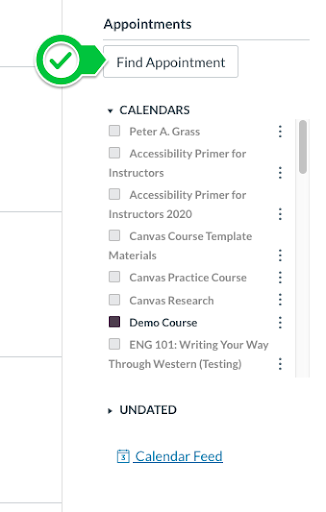
- When your student goes to the Canvas calendar they will see a Find Appointment button at the far right.
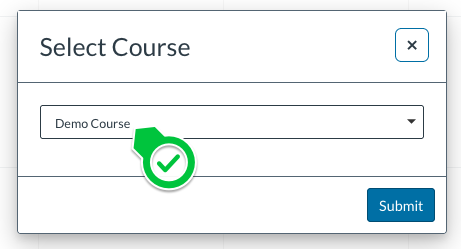
- Once they student clicks the Find Appointment button they will see a pop up window where they can select what class it is for:
- The student will see the office hour slot, be able to click on one of the time slots and sign-up.
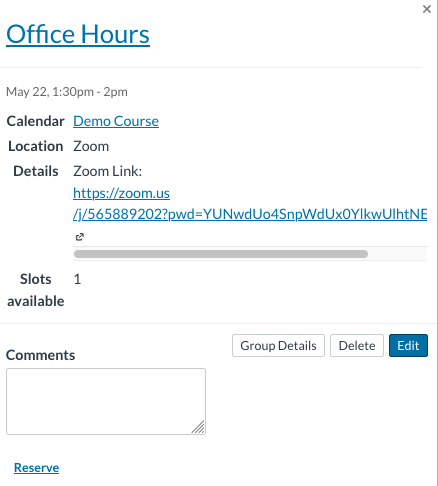
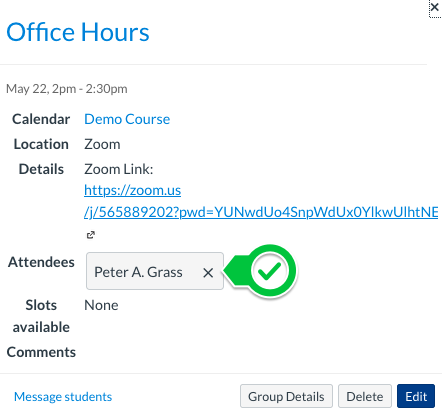
- As the instructor you can look at the office hours in the calendar and the items that are grayed out indicate time slots that have not been filled. You can click on the non-grayed out time slots and see who has signed up.
How to create virtual office hours in Microsoft Teams
Recurring Zoom Meeting
You can set up office hours (or classes) using the Schedule Meeting option in Zoom. This can be initiated in several ways, including Access via the App and Access via the Web (both below). If the meeting is being initiated via the Canvas integration, follow the instructions for Access via the Web. If the meeting is being initiated via the Outlook integration, note that the “no fixed time” option is not available.
Recurring Meeting via the App
- Access via the App: Launch the app that you have installed on your computer (see https://wwu-edu.zoom.us/download and log in with your Pro (Zoom for Western) account.
- From Home, select Schedule.
- Enter a Topic and all applicable settings for your meeting.
- Enter a checkmark by Recurring meeting. This automatically sets the meeting with “no fixed time” and removes references to specific dates and times.
- Save.
Recurring Meeting via the Web
- Access via the Web: Either www.zoom.us, or https://wwu-edu.zoom.us and log in with your Pro (Zoom for Western) account.
- From Meetings, select the Schedule a Meeting button.
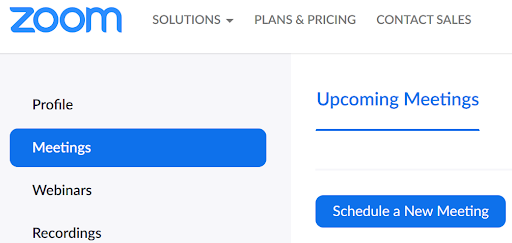
- From Meetings, select the Schedule a Meeting button.
Office Hours Option 1: FIXED TIME
NOTE: This results in a series of Zoom meetings tied to particular days & times, all using the same Zoom link. If you are providing a link to students, it may be simpler to create one recurring meeting instead (see below).
- In the Schedule a Meeting editing window, enter a Topic and all applicable settings for your meeting.
- Enter a checkmark by Recurring meeting.
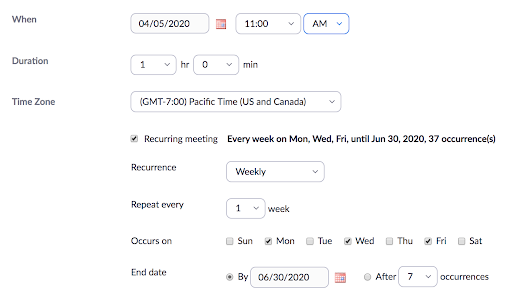
- Enter the frequency of office hour meetings under Recurrence (such as Weekly) and how often to repeat (such as every week) and which days of the week, and then enter an end date/number of occurrences.
- Select Save.
- A new meeting will appear in your Zoom interface for each of the days & times indicated in your meeting settings. These are not visible to students unless you are using the Canvas & Zoom integration.
- Note that if you decide later to edit this recurring meeting, you will be given the choice to only edit one instance, or all instances.
- These meetings will appear under your Meetings tab as separate meetings; however, the same Join URL is used for all of them.
- Copy and paste the invite link into Canvas and post prominently in Modules, a page, or an announcement.

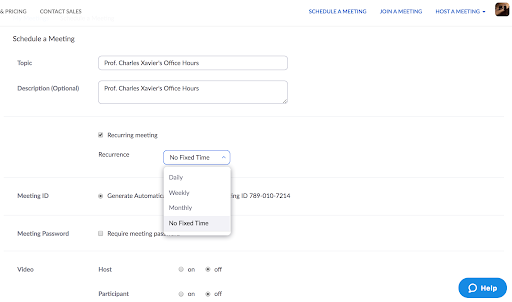
Office Hours Option 1: NO FIXED TIME (preferred)
NOTE: This results in ONE Zoom meeting that can be accessed at any time. Be sure to follow instructions to only allow students into the meeting while you are there. See video: Zoom: Office Hours
- In the Schedule a Meeting editing window, enter a Topic and all applicable settings for your meeting.
- Enter a checkmark by Recurring meeting.
- After putting a check mark by Recurring Meeting, change Recurrence to No Fixed Time.
- Select Save.
- A new meeting will appear in your Zoom interface. This meeting is not visible to students unless you are using the Canvas & Zoom integration. Copy and paste the invite link into Canvas and post prominently in Modules, a page, or an announcement.
Other Settings to Consider
- Require Meeting Password - You can set a password students will need to enter to access the meeting.
- Enable Waiting Room. This requires the meeting host/instructor to allow entry into the meeting by holding them on a Zoom page where they are notified they are in a waiting room for your session.
- When scheduling a new meeting or editing an existing one, enter a checkmark to enable Waiting Room
- The host/instructor will need to admit participants into the Zoom session one or more at a time.
- While this feature is particularly useful for “Office Hours” or to control entry to a meeting, it also requires the host’s attention to manage it.
- It’s useful to know that it can be turned on and off during a meeting.
- DO NOT Enable Join Before Host. Keep this unchecked to ensure students cannot access the meeting before you. This can be a conflict if you are in another meeting at the same time as Zoom will not let you, with the same account, run two sessions at once.
See also: Scheduling meetings (Zoom Help Center)