Getting Started with Teams
This guide covers:
- Accessing Teams
- Creating a Team
- Starting and Sharing a Link to a Meeting
- Conducting (Joining) a Meeting
- Meeting Controls
- Recording a Meeting
- Sharing a Recording to Canvas
- Finding Recording in OneDrive
- Setting up Auto Transcription
- Sharing Options
Getting Started with Teams
Teams is a powerful workgroup tool available as part of Office 365. It can be used for collaborative work, is secure (only available to authenticated users of Western’s Office 365) and accessible to all faculty, staff and students.
- See also: Accessing Teams by Mariah Warner, ATUS
Accessing Teams
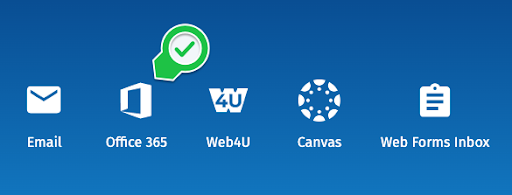
You’ll find Teams by logging into your MyWestern and selecting Office 365 from the icons at the top of the page. This will take you to Office 365 and allow you to access Teams.
- See also: Finding and Creating a Team by Mariah Warner, ATUS
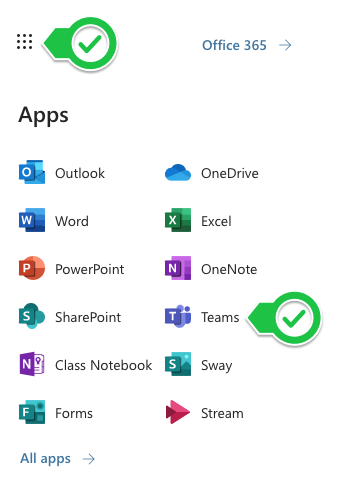
You can find Teams by clicking on the dot grid at the upper right corner. It should be available as one of your apps. If it is not visible, select All Apps at the bottom and it will be listed alphabetically in the resulting drop-down list.
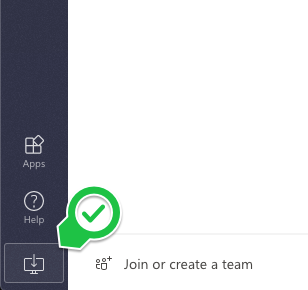
While Teams is available as a web tool we recommend downloading the Teams app (available for both MacOS and Windows) as it has additional functionality such as web conferencing. When you first open the web-based version of teams you can download the desktop app by clicking on the icon at the bottom left corner of your Teams window.
Creating a Team
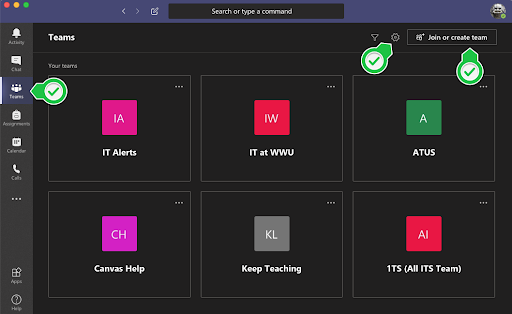
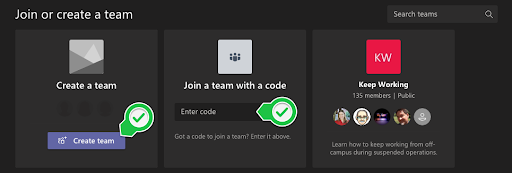
Once you’ve downloaded the app you can select the Teams icon on the left side toolbar. The button labelled "Join or create team" (upper right corner) allows you to create or join a team. The gear icon at the top right allows you to manage your teams and switch the view. If you’re using this for your class you’ll need to create a team for the students to access.
Click on the purple button to create a team or you can join a team using the supplied code.
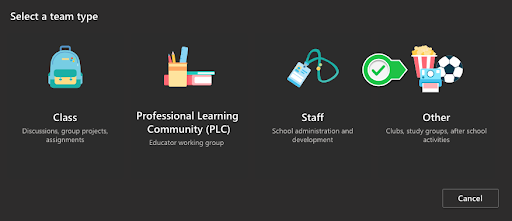
Select the purpose of the team you wish to create. Because Canvas is the primary tool for delivering educational content we recommend using Other for creating your class Teams page.
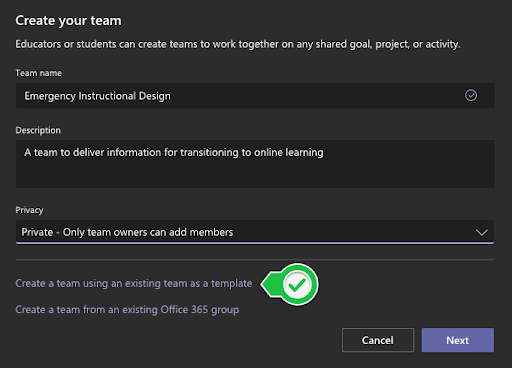
Give your team a name and description, both of which will be visible to team members and will help identify your team if they have multiple teams they are accessing. You can also choose to use a previous team as a template for creating a team to save time.
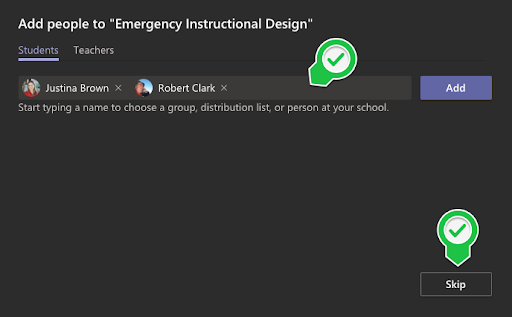
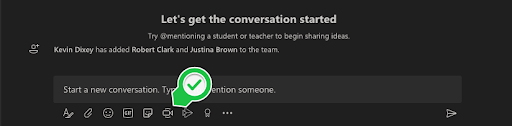
You can add students and teachers to your team by entering in their WWU email addresses or choose to skip this process and adding them at a later point.
This gives you a space to chat, post files, add additional content and hold video conferences for your class.

Starting and Sharing a Link to a Meeting
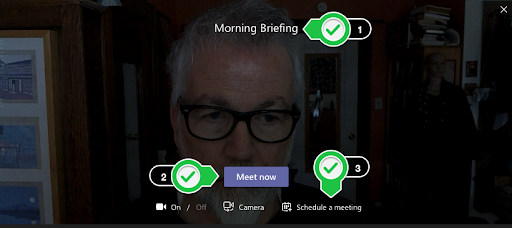
At the bottom of the Teams screen you will see a row of small icons. The small video camera icon allows you to start up a video conference.
You have the option to:
- Name the meeting
- Open up the meeting immediately using the Meet Now button
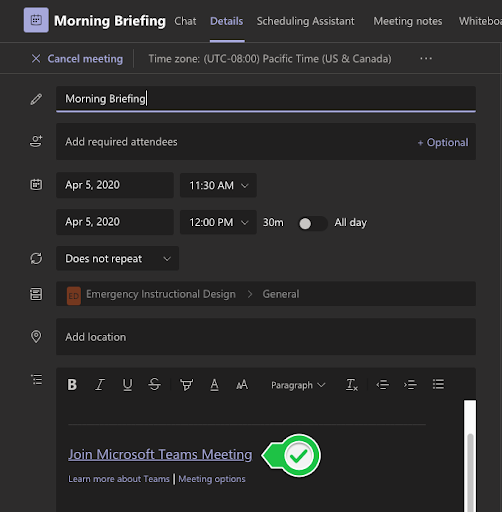
- Add the meeting to your Outlook calendar.
If you choose to schedule a meeting you will have the option to add required attendees as you would in Microsoft Outlook or simply copy the link that will be generated at the bottom and copy that into a Canvas announcement.
Joining a Meeting (scheduled)
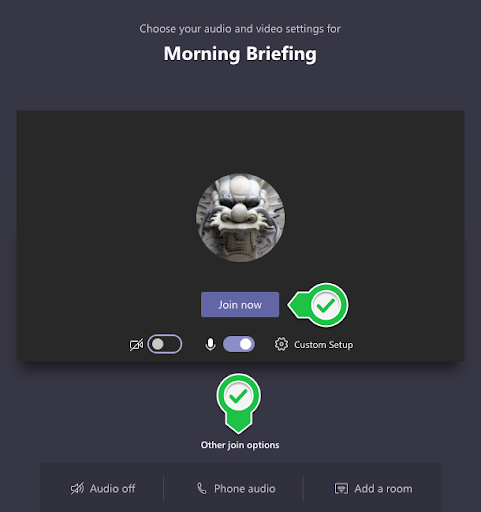
When pasted into a Canvas announcement the link provided by Teams will allow the user to join either through the web or by using the Teams app. The user will then have the option to join the meeting, set their camera and microphone preferences or join the meeting using phone audio.

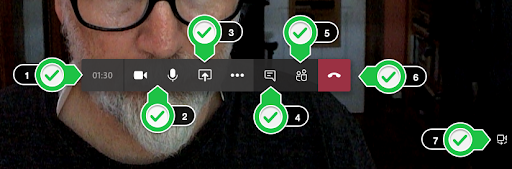
Meeting Controls
- Time elapsed
- Camera and Microphone controls
- Share screen or document
- Show Chat Window
- Show List of Participants
- End Meeting
- Switch Camera (if you have multiple webcams)
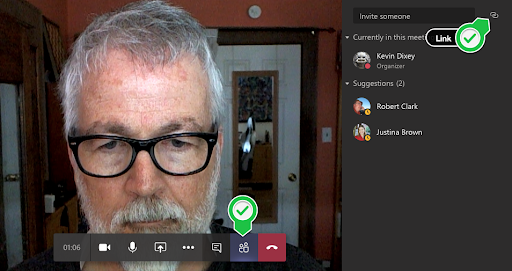
Joining a Meeting (meet now)
If you decide not to schedule a meeting but instead choose the Meet Now option, once in the meeting you can make the participant list visible and use the link tool in the upper right to copy and paste the link to a Canvas Announcement, chat or email.
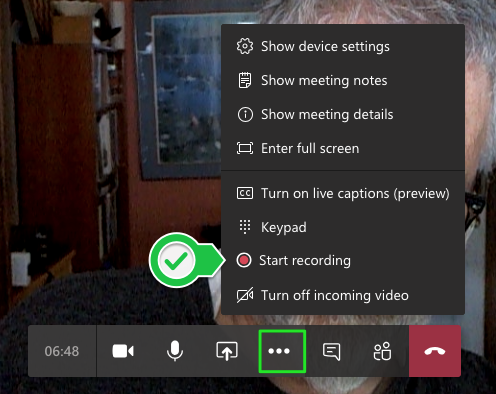
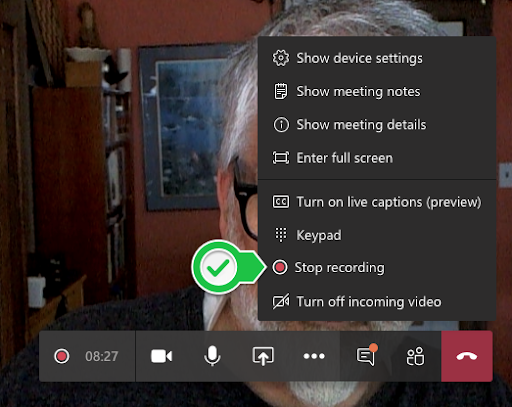
Recording a Meeting
To record a meeting you need to click on the three horizontal dots located on the meeting control bar and select Start recording. Once you stop the recording it will automatically save it to Microsoft OneDrive where you can easily share it via a link or embed code to Canvas.
Sharing a Recording in Canvas
After a Teams session is recorded, the recording will be available via OneDrive. Since these recordings are optimized for access via a link and/or downloads and are not captioned, we recommend that any recordings intended to be shared with students be transferred to Panopto.